
4 · Your first character#
Create it#
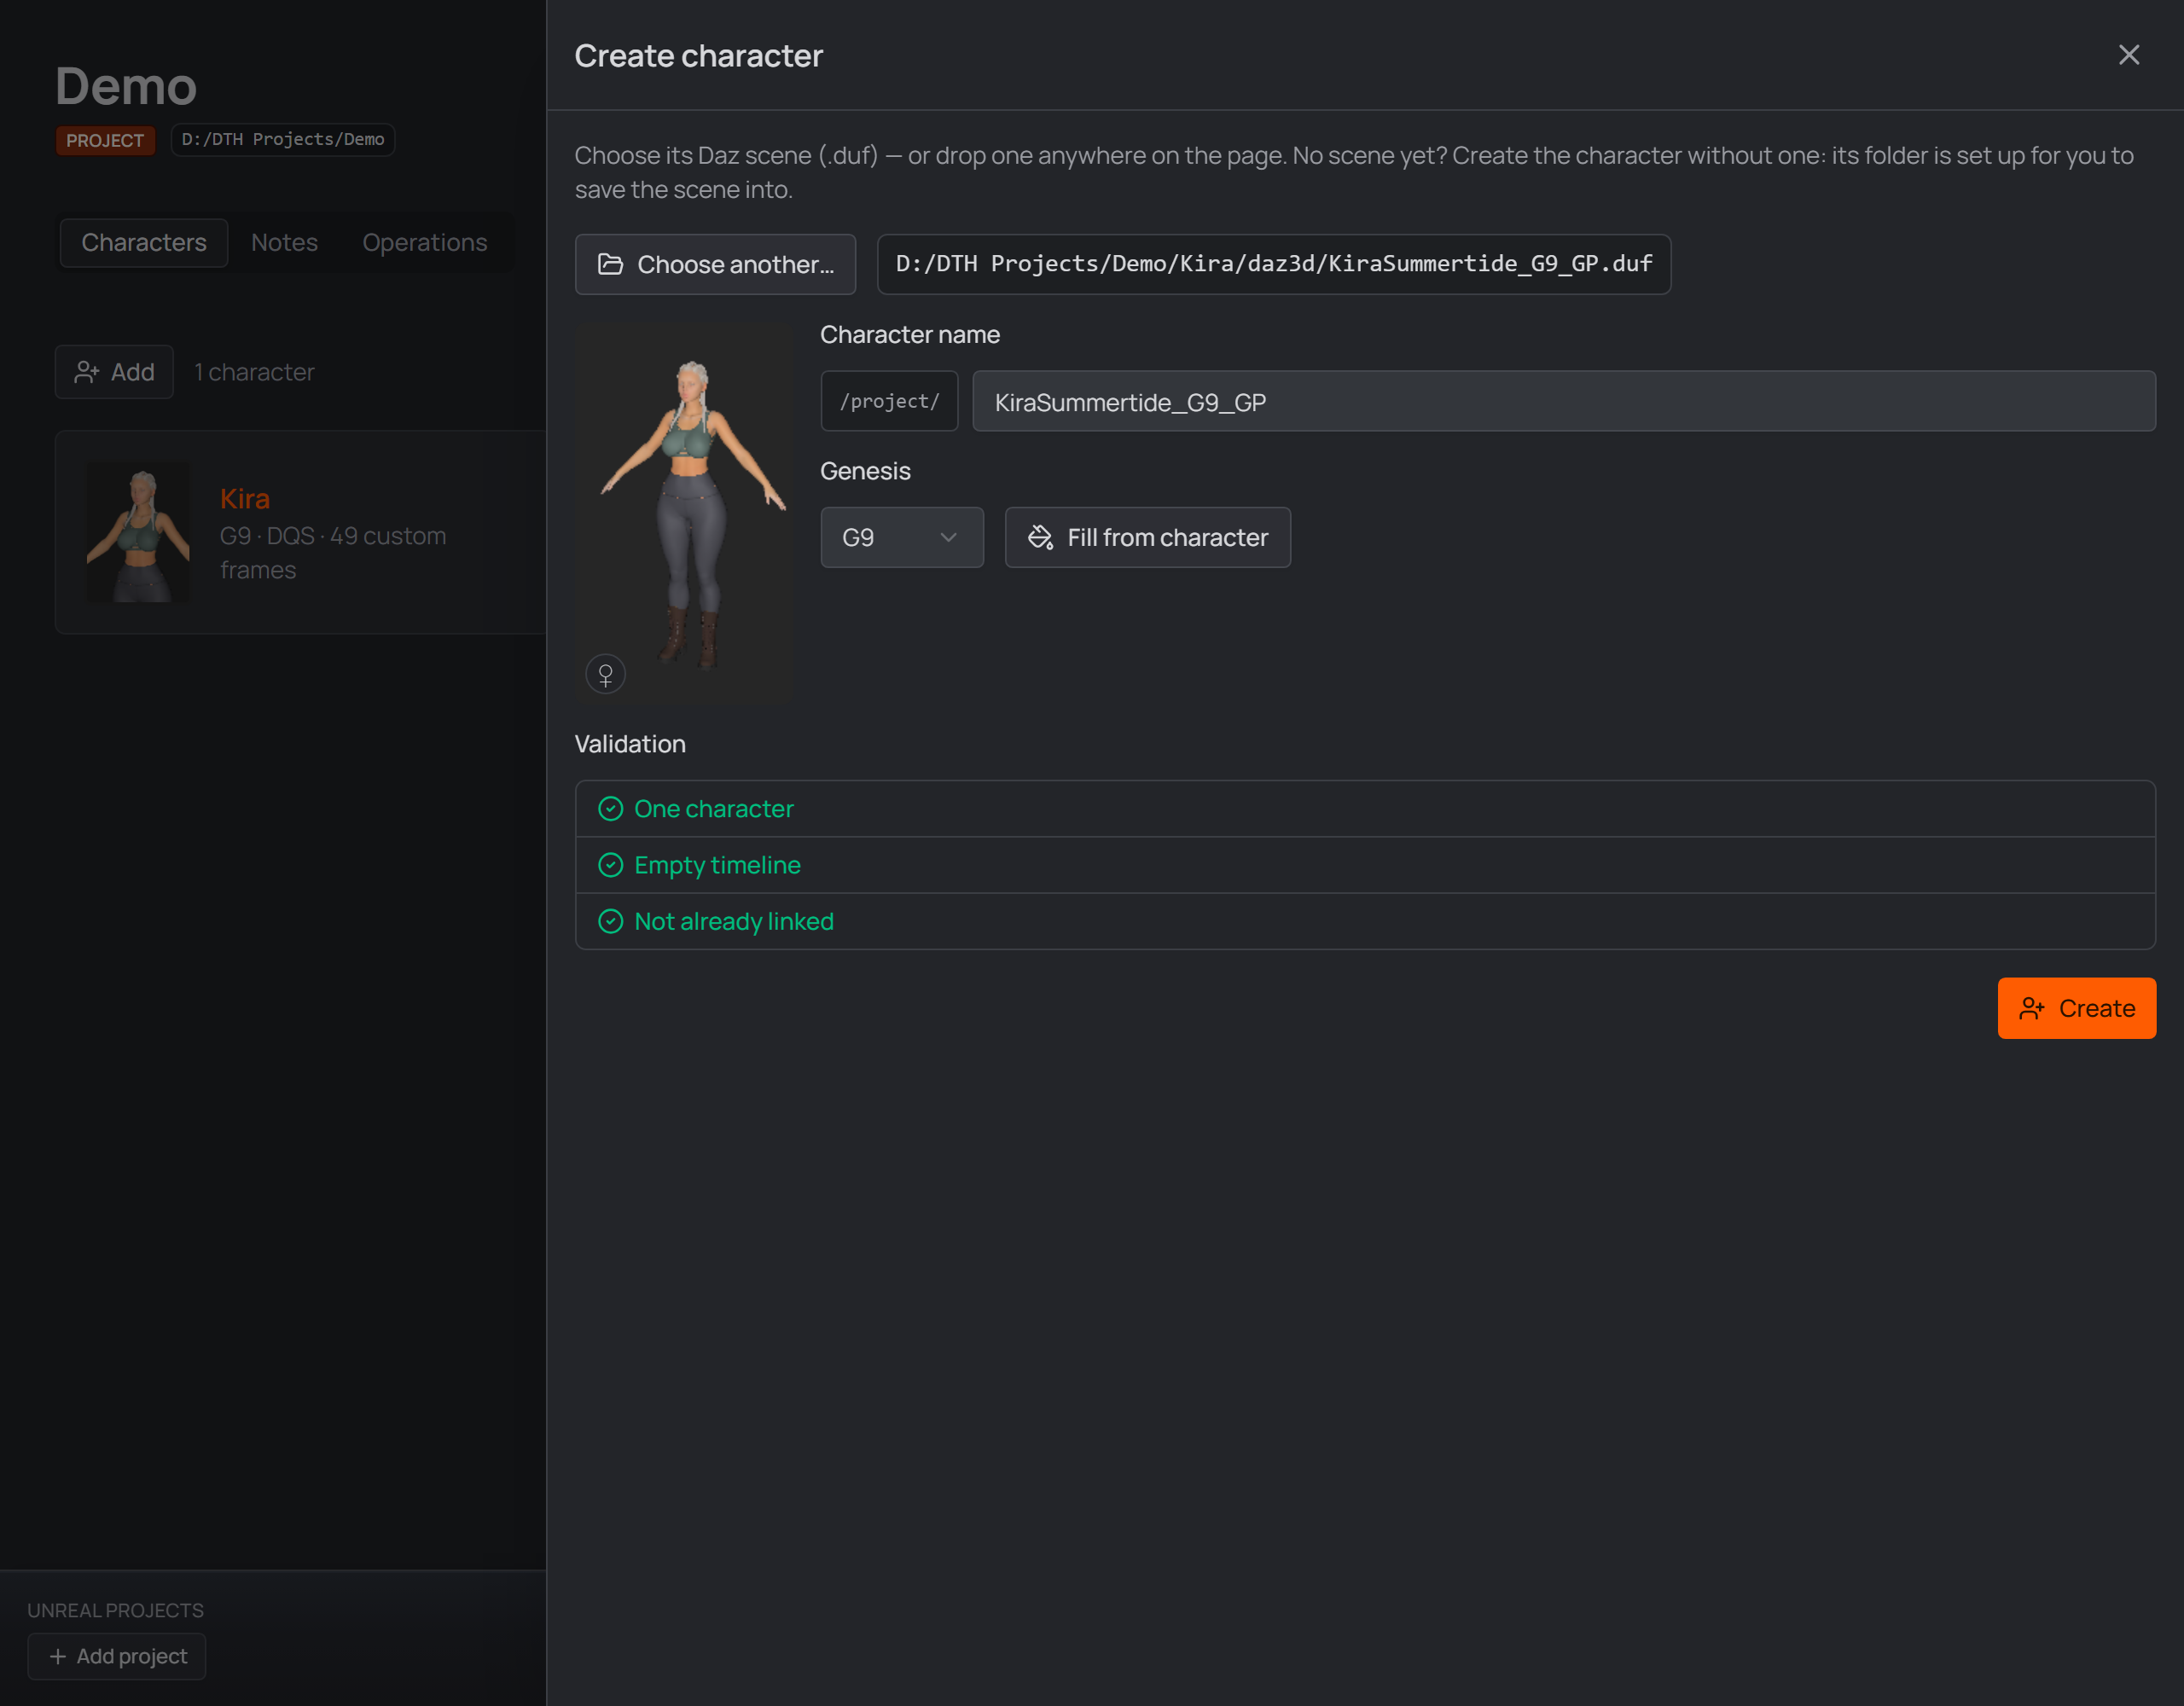
The Add character panel in the project window.
- In the project window press Add character (or drop a
.dufanywhere). - Choose Daz scene… — pick the character's scene file. The studio reads it, fills in Genesis and Gender, and validates that the scene holds exactly one character with an empty animation timeline (the ROM script fills the timeline itself). Create anyway overrides a failed check — except one: a scene that already belongs to another character of the project is refused outright.
- Name it — the name becomes its folder in the project.
- Fill from character (optional) — copies a working ROM definition from any existing character across your projects: pick the source and check which sections to copy.
- Press Copy & Create — the scene is copied into the character's folder and your original stays where it is (the toggle beside it turns the copy into a move). Link & Create leaves the scene where it is instead; a scene already inside the project shows a plain Create.
Tip
No scene yet? Skip step 2 and press Create without scene — the
character's folder (including the primary scene's subfolder, e.g.
daz3d/primary) is created for you, so you can save your new scene there
straight from Daz Studio. The
character page stays locked until you link that scene as the primary (the
Daz scenes panel shows the exact folder and the Link Daz scene button);
the first link also derives Gender, Genesis and the Genitalia section from
the scene, exactly like a normal create.
Character settings#
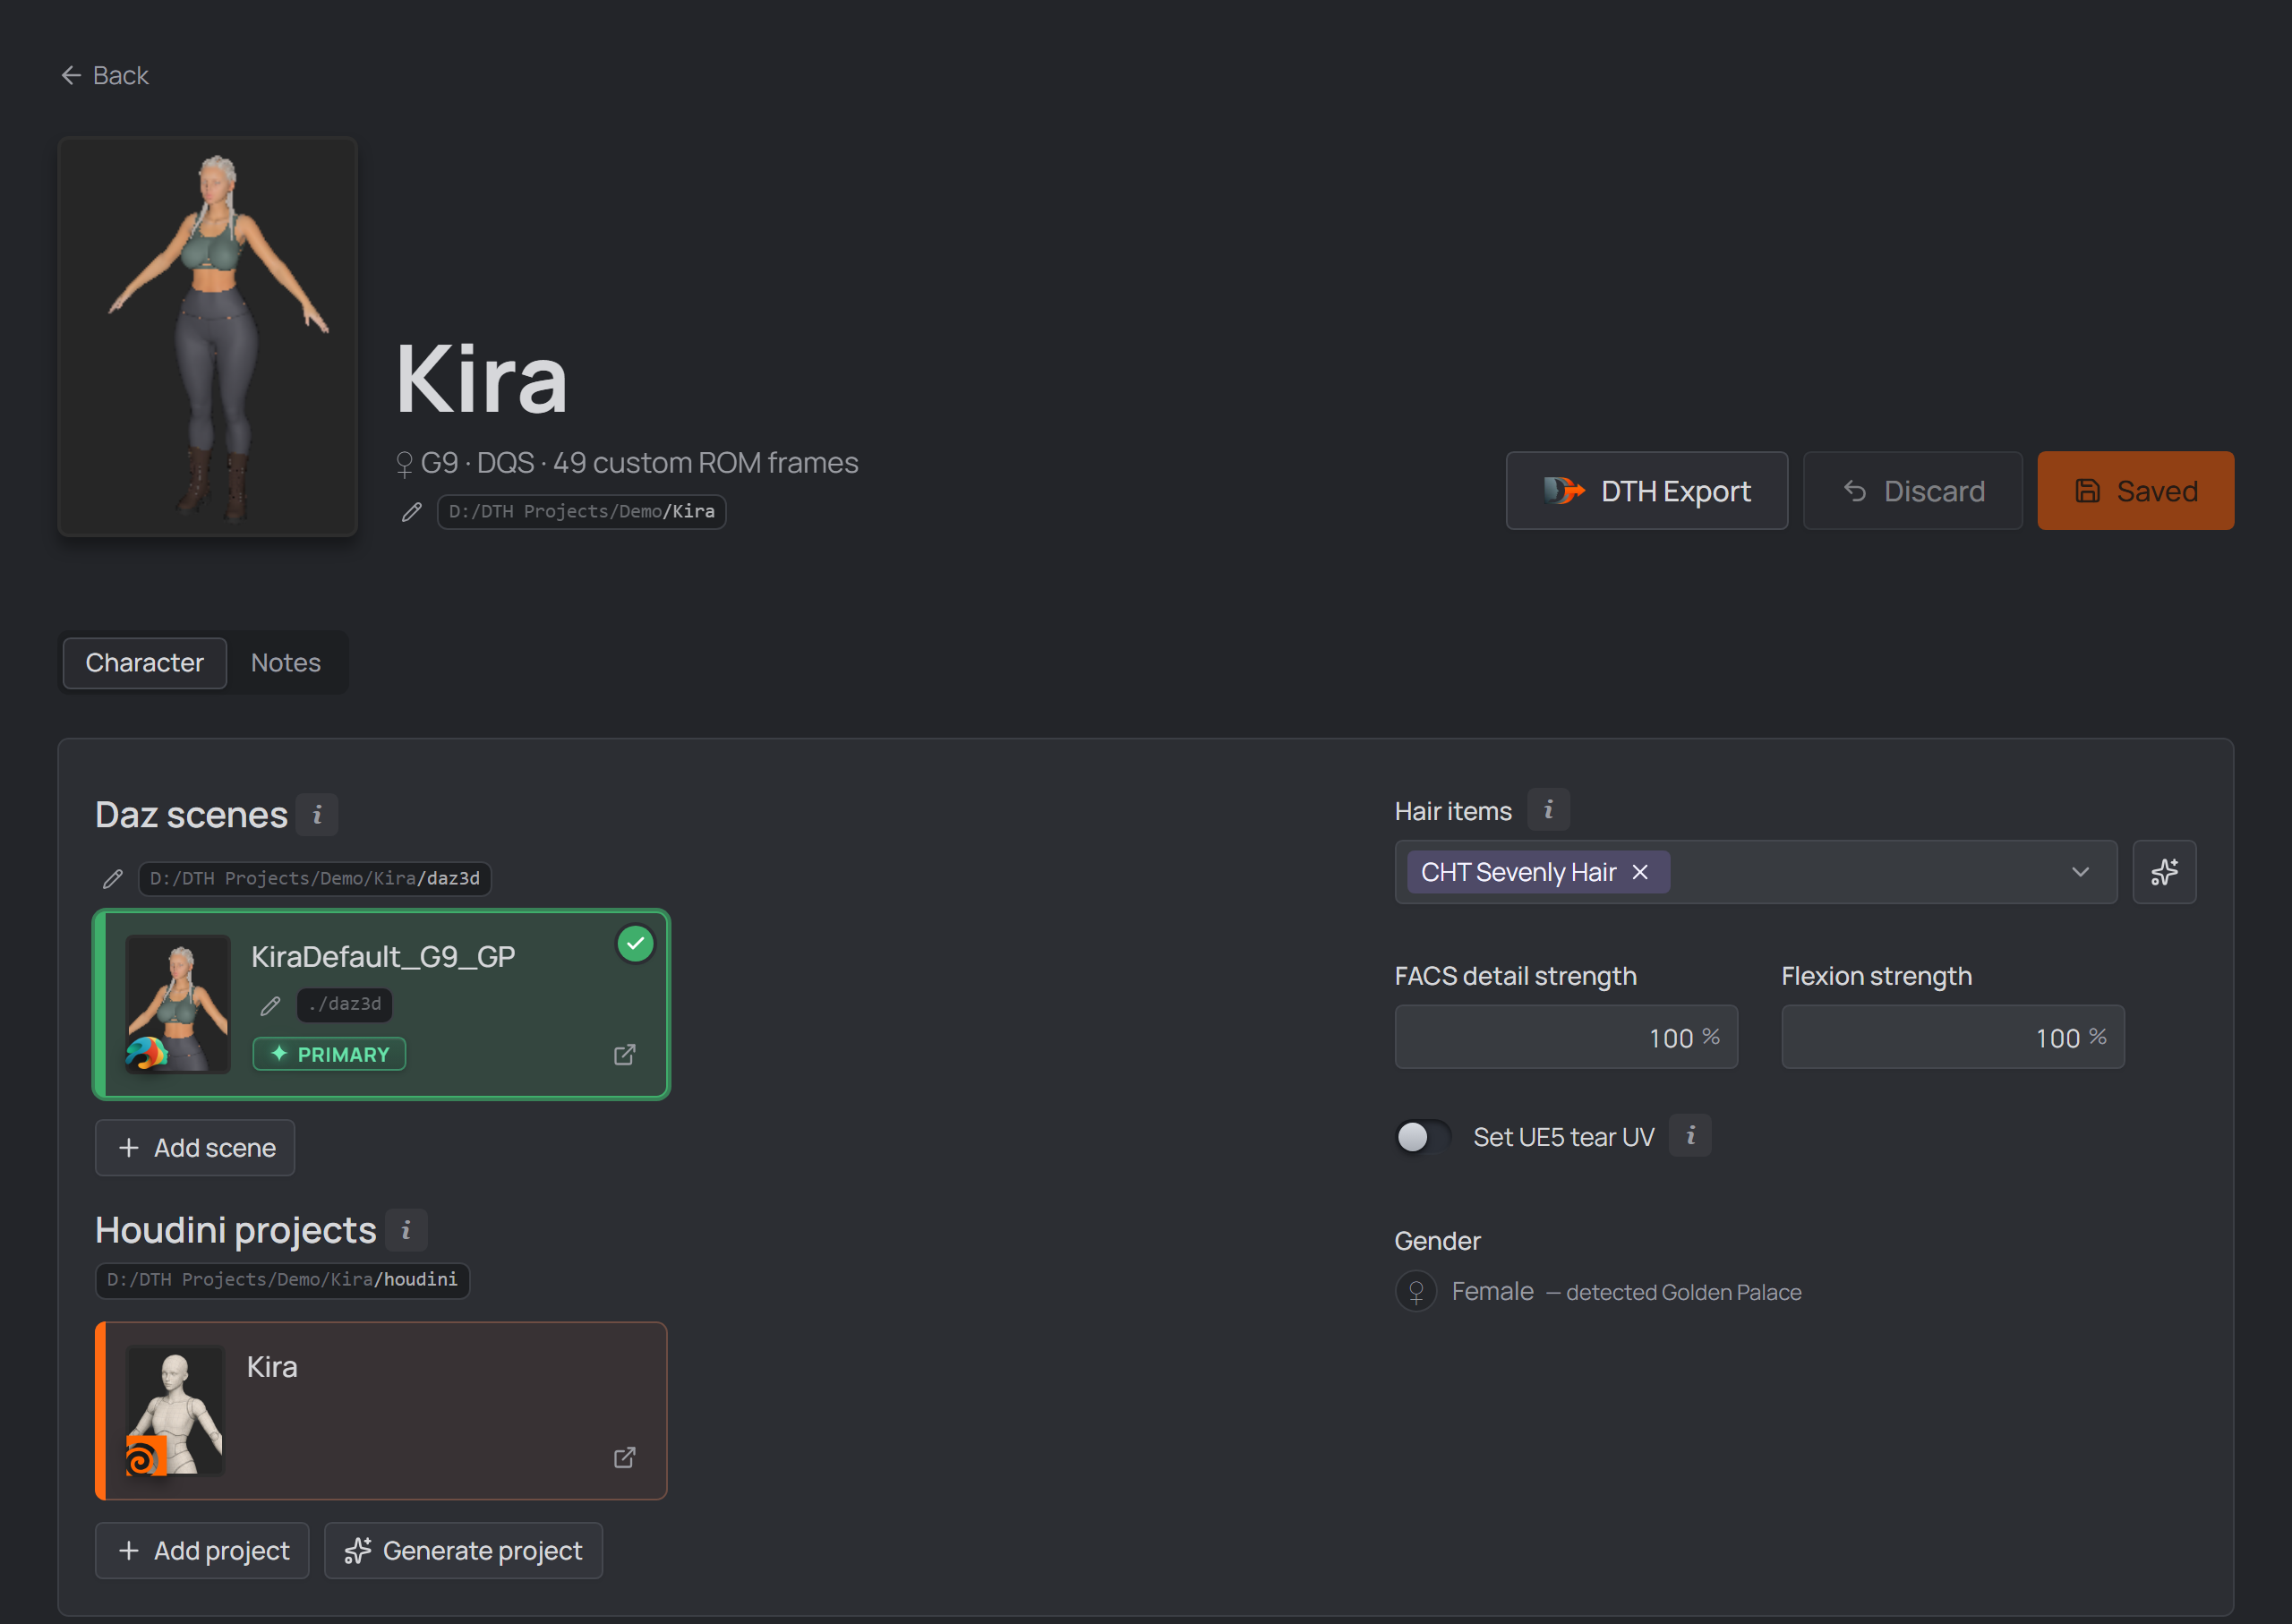
The top of the character page: the primary Daz scene, hair items, the Genesis 9 dials, the derived Gender, and the linked Houdini project.
Genesis and Gender are set at creation; Gender never changes. On the gender-neutral G9 it comes from the GP/DK geograft — Golden Palace → female, Dicktator → male — the same detection that drives the GEN section. All four generations are selectable, but the deeply validated path is G9 (and G8.1 on the old pipeline); for the others, the studio offers whatever pose assets the active DTH release ships.
The sidebar's three Genesis 9 dials sit under the hair items (on any other generation they are shown greyed out):
- Set UE5 tear UV — the ROM script switches the Genesis 9 Tear figure's UV Set to UE5 during the build, so DTH's Lacrimal Fluid material lines up without the manual Surfaces step. Only matters if you use that material; off by default, and G9-only.
- FACS detail strength / Flexion strength — the G9 dials FACS Detail
Strength and Flexion Automatic Strength, applied at frame 0 as the ROM
builds. Leave them at
100 %unless the stock correctives need dialing up or down.
Linked files — Daz scenes & Houdini projects#
|
Tip
Hair items (per-scene hair kept out of the export) and everything else around multiple Daz scenes on one character — outfit variants, the selected scene, and per-scene overrides (the whole ROM, identity dials, preserve items) — read Advanced: Multiple Daz scenes.
Script install location & export directory#
The Daz scripts generated box shows where the generated ROM_… (and, with
split export, Export_…) scripts install on Save:
<My DAZ 3D Library>/Scripts/DTH-Character-Studio/<project>/<character>/
("My DAZ 3D Library" comes from Settings). It also holds the
two export switches — combined vs split export, and the hair pass —
detailed in Build the ROM in Daz.

The Daz scripts generated box: the install location and the two export switches.
The Export directory section shows where direct export
lands. It's fixed and read-only: daz-export inside the character's Houdini
folder, created with the character. Those files exist only to be imported by
Houdini, so they sit next to the .hip that reads them ($HIP/daz-export/…)
— see where the Houdini project fits.
Add morphs on frame 0#
Morphs dialed once at frame 0 of the ROM. With no item scope — the small labels under the field reading All items — a row lands on every node that carries the morph, the figure and every fitted item, so one row like a clothing Expand All reaches whichever outfit pieces the open scene wears. Auto-follow puts the same dial on every conformed item, though, so a fit value meant for one backpack would deform the boots and gloves too: picking a suggestion scopes the row to the item its dial lives on — shown as those same small labels, mirroring the suggestion you picked, with an ✕ that returns the row to every item. A scene without the morph — or the item — simply skips it. Overridable per Daz scene. |
Advanced options — preserve morphs & node transforms#
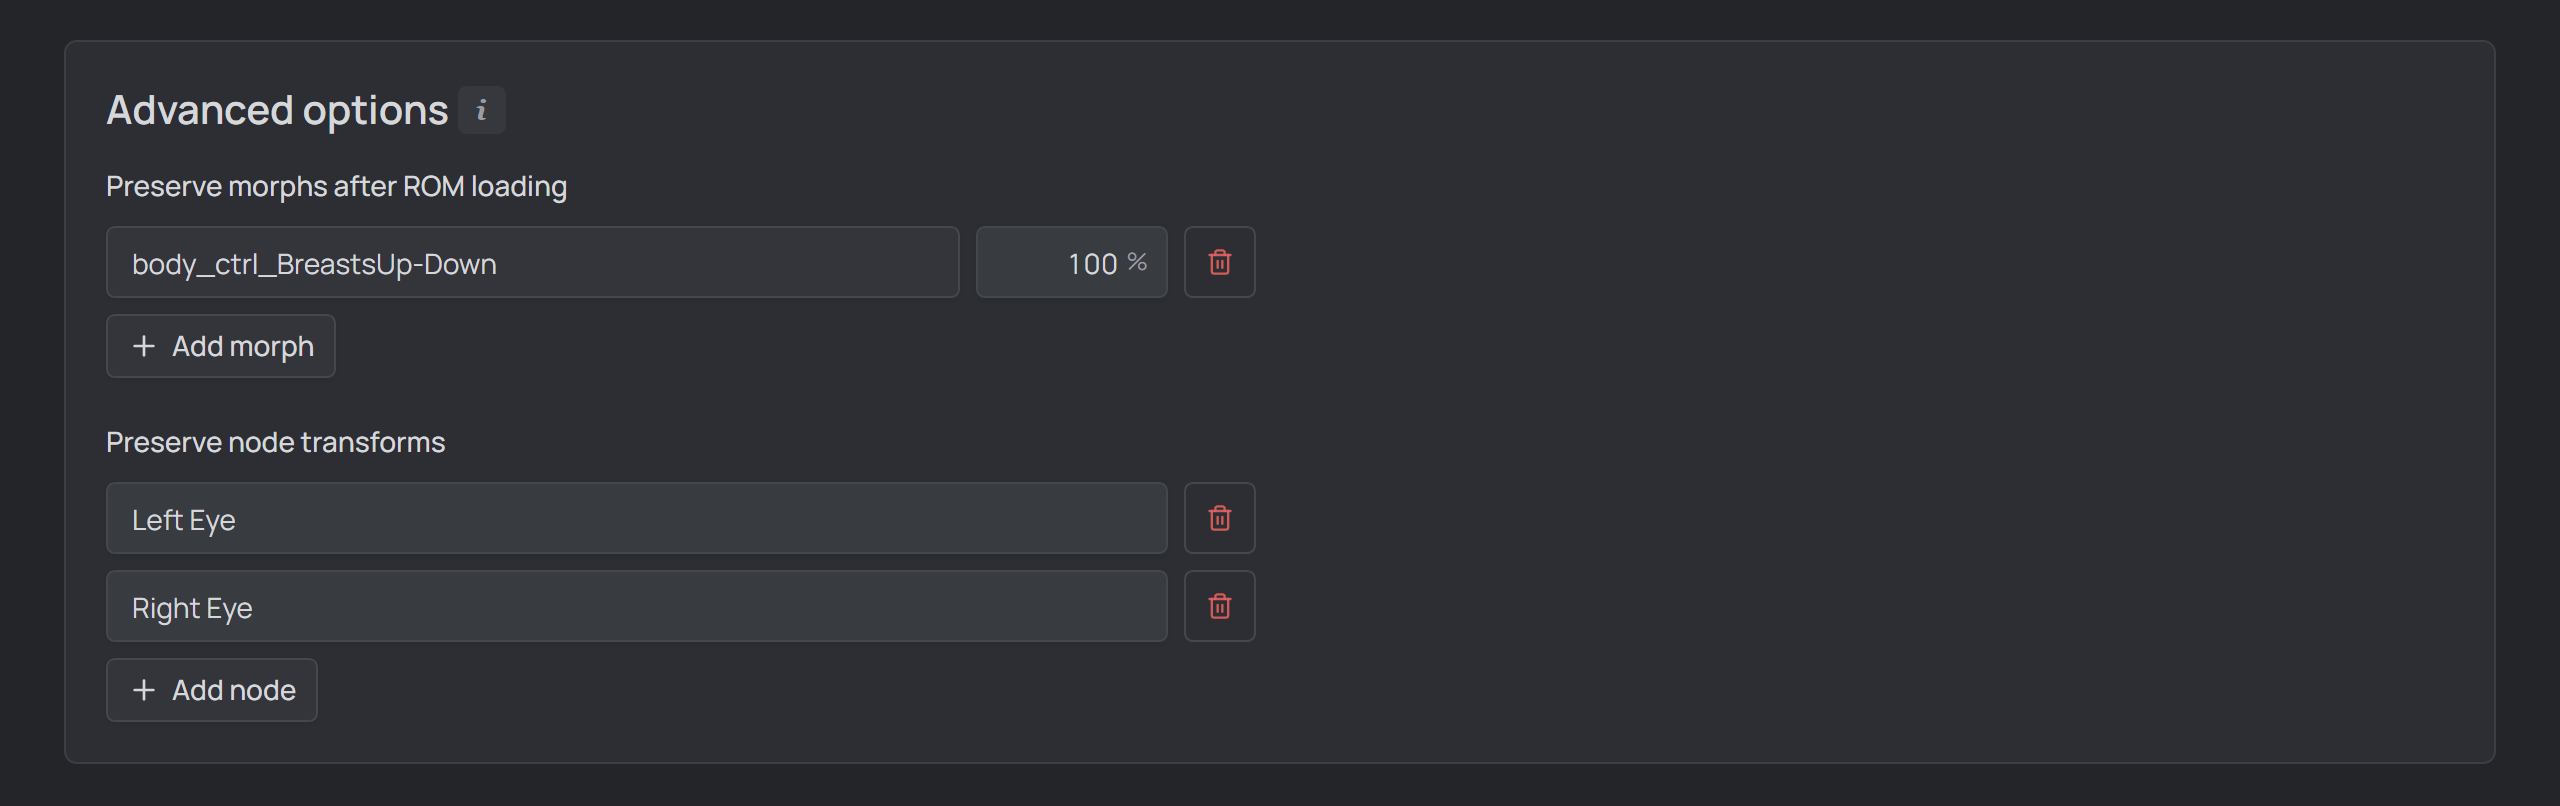
The Advanced options panel near the bottom of the character page — none of it is needed for a working ROM:
On a non-primary Daz scene both lists are overridable, so an outfit scene can preserve different morphs or nodes than the primary — see Advanced: per-scene overrides. |
The ROM definition#
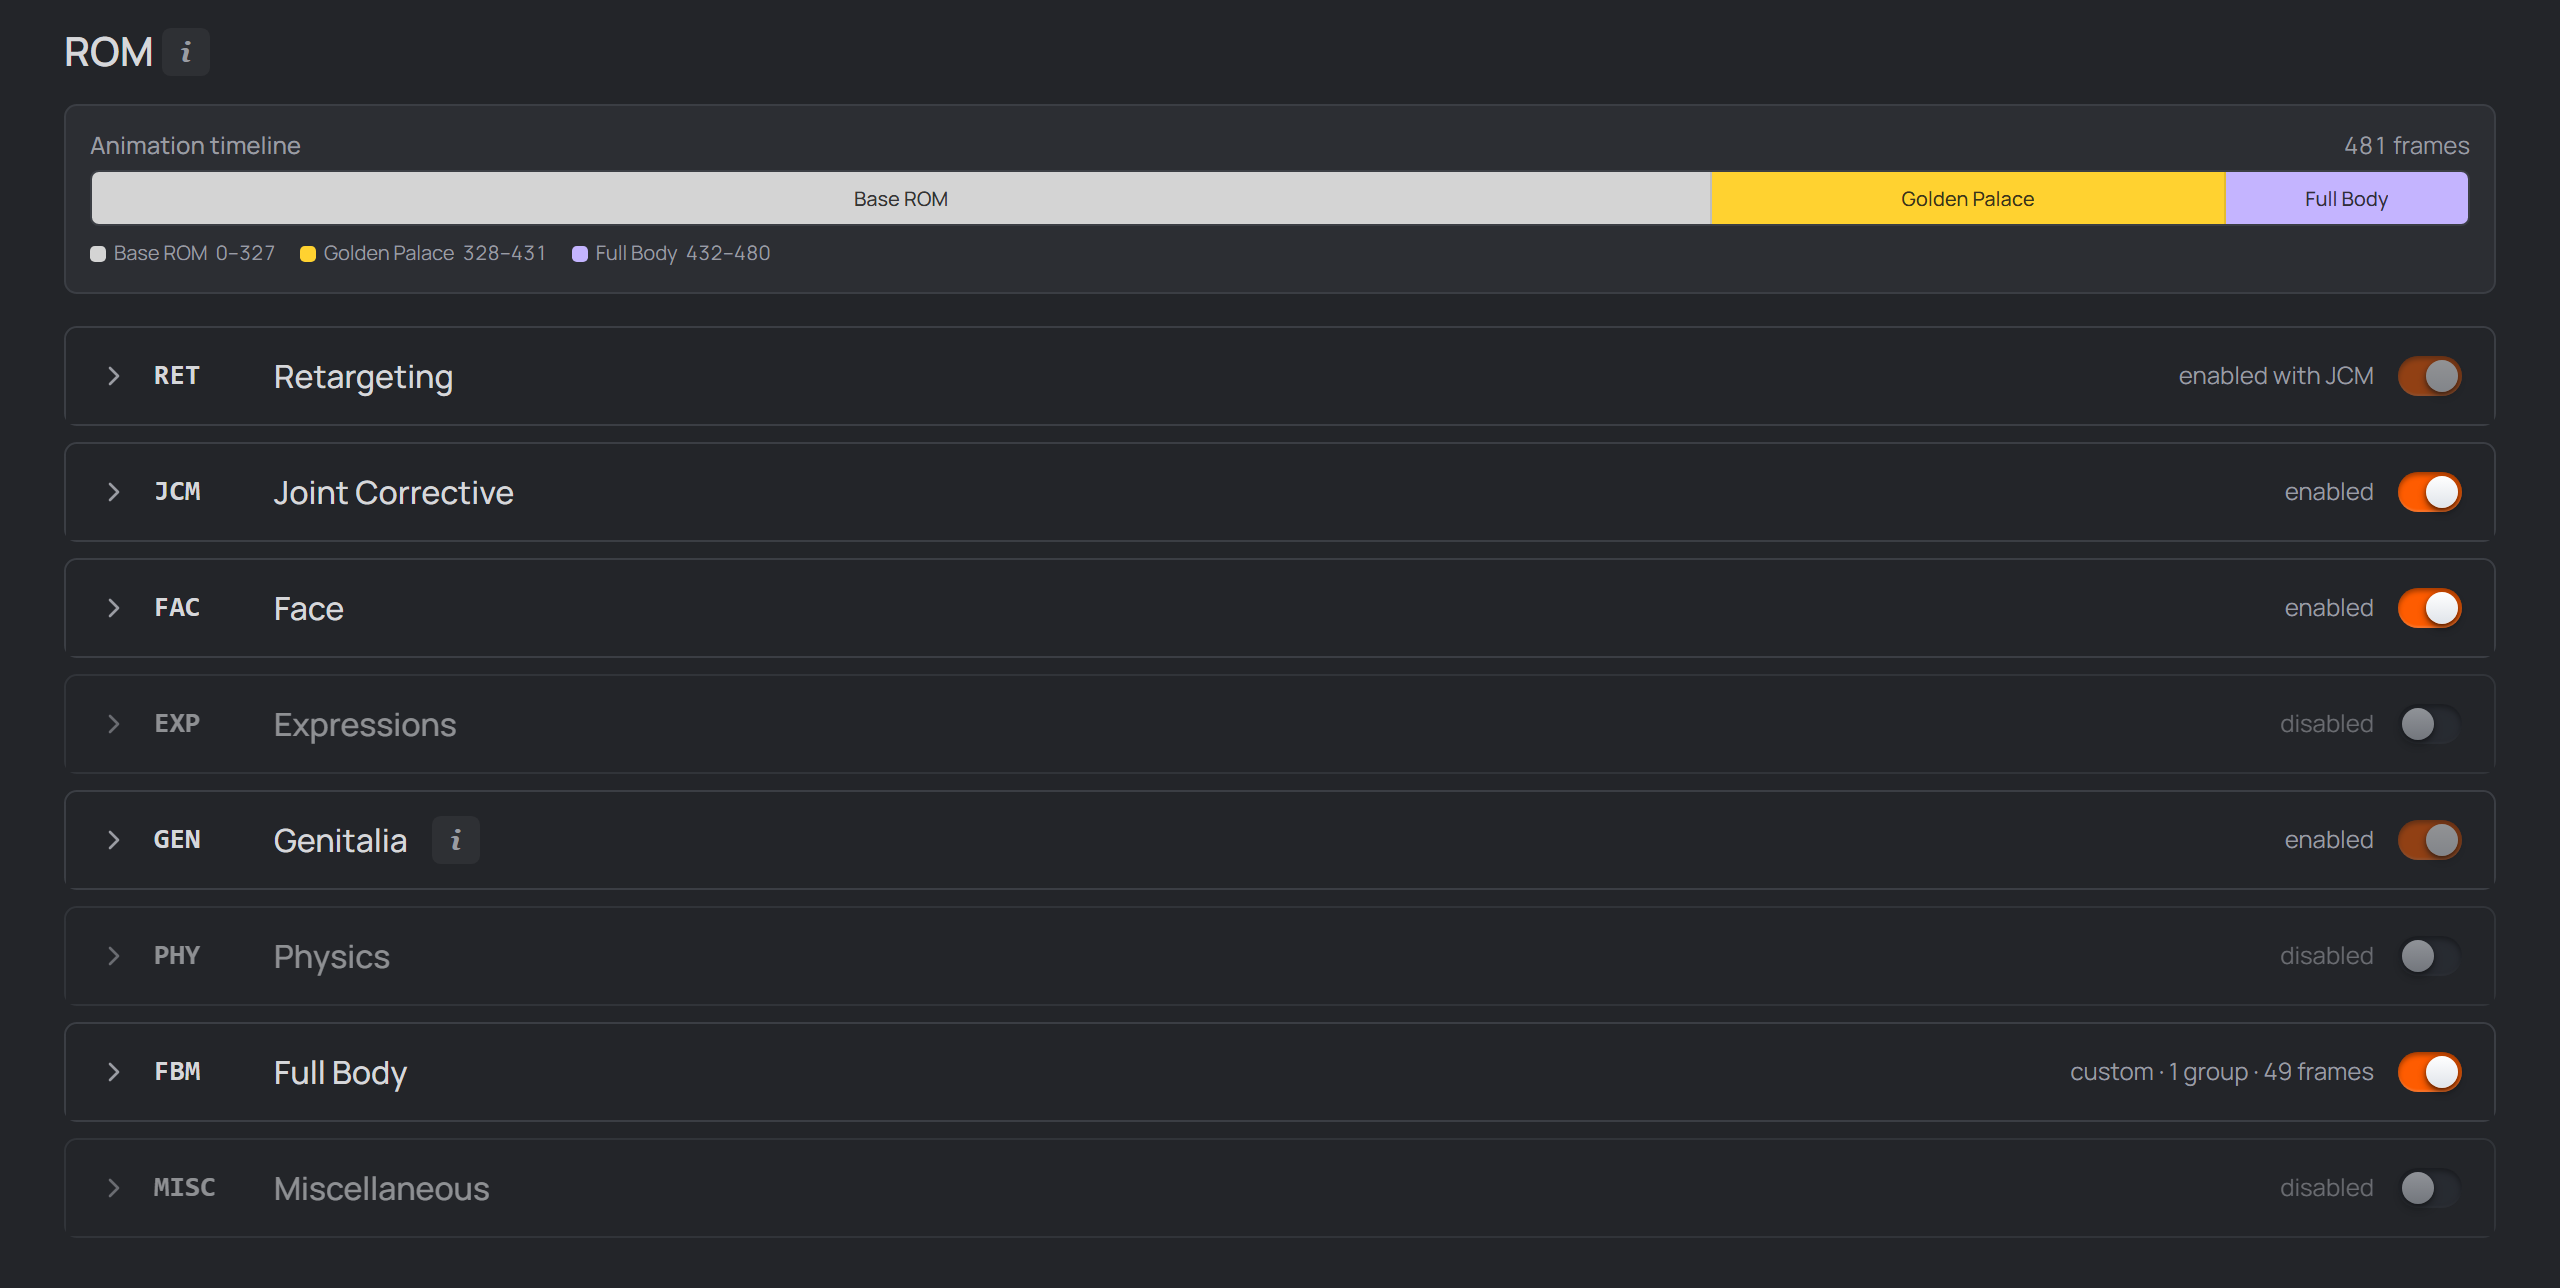
The ROM sections on the character page.
A ROM is a fixed sequence of eight sections. Each can be enabled or disabled, and runs in Preset mode (the DTH release's stock pose assets) or Custom mode (your own poses and morphs).
Above the sections, a colored timeline bar maps the whole ROM live as you edit — one segment per block, hover for its exact frame range.
Golden Palace & Dicktator — the genitalia (GEN) section#
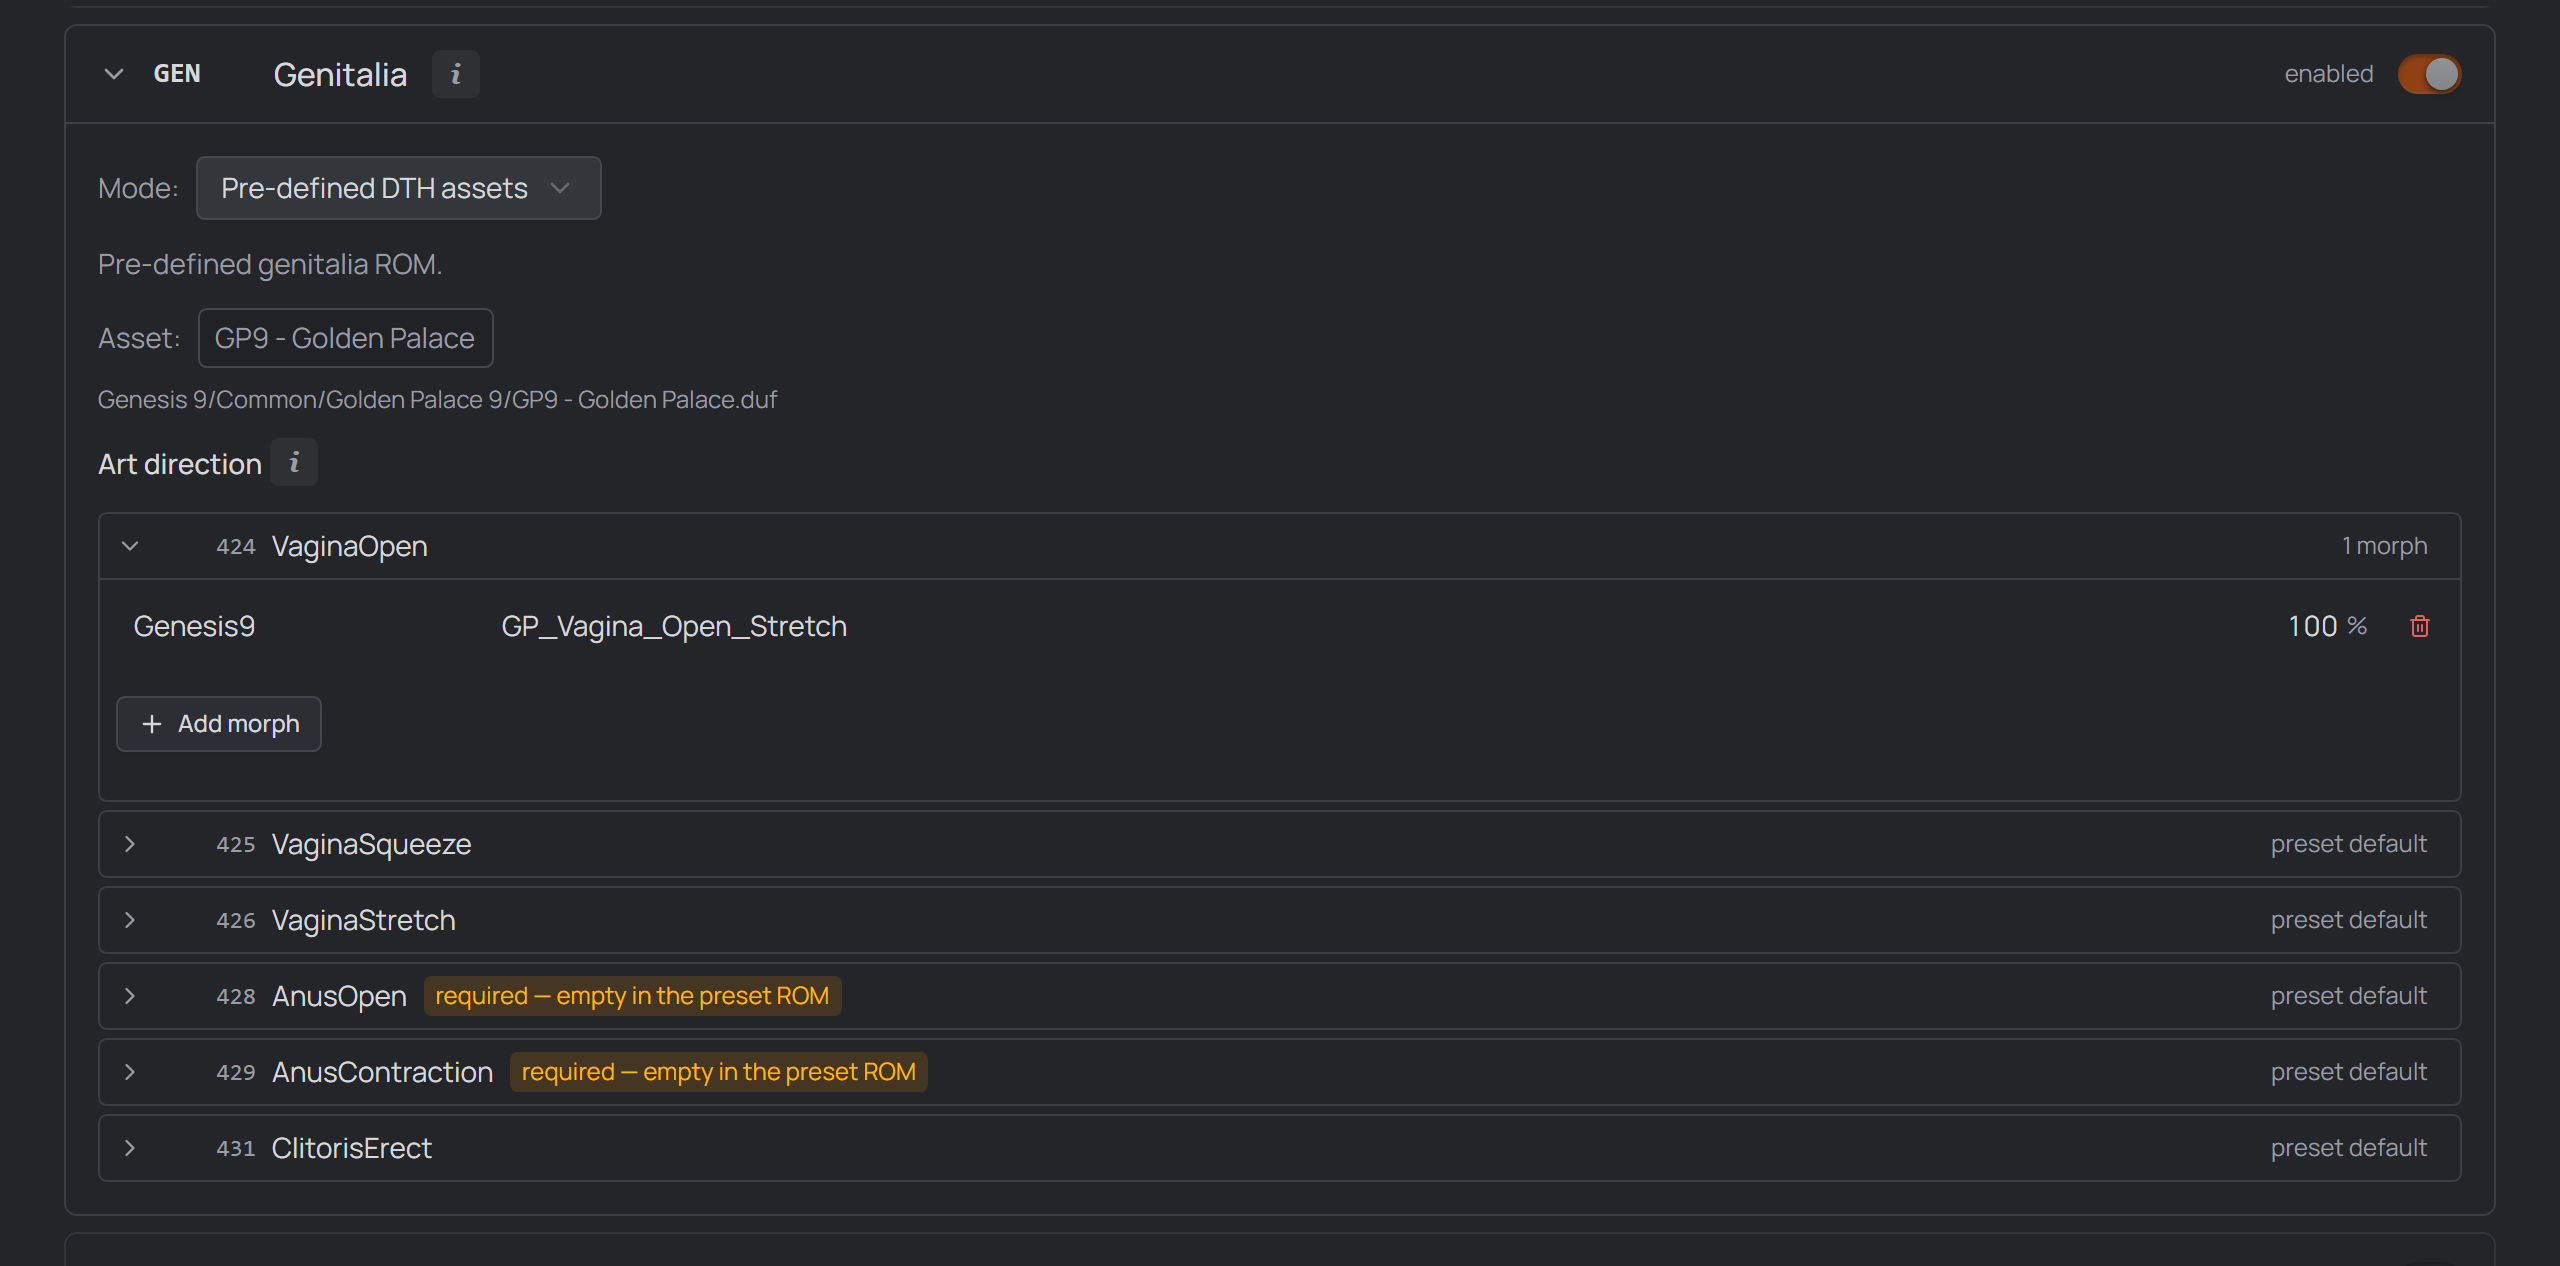
GEN is the genital geograft's range of motion. You don't enable it by hand: it turns itself on exactly when the primary scene contains a Golden Palace / Dicktator geograft (detected when the scene is linked at creation) — the same graft that derives the character's Gender. Our example G9 Female carries Golden Palace, so her GEN section covers it. In Preset mode the studio drops the DTH release's stock GP/DK ROM block into the fixed GEN slot (after EXP, before PHY). The preset supplies the motion — the look is yours: the section lists the block's Art direction frames, and for each one you set the morph (or morphs) that give it the shape you want — node, morph name and value, like any custom morph. Frames flagged required — empty in the preset ROM do nothing until you set a morph there; frames you leave alone keep the preset default. Two things worth knowing:
You built your own pose asset for the genital graft? Switch GEN to Custom and use your own asset! |
Note
The studio computes every frame number from this structure — you never type a frame, and the Daz and Houdini outputs can't drift apart.
Tip
Want to learn all about the ROM process itself — what the blocks do and why? Read mrpdean's original DazToHue documentation — the learning resource this studio builds on.
Custom morphs#
For this example we add some Full Body Morphs (FBM): switch the section to Custom and list the morphs your character should use.
Filling in those rows is its own chapter — the two name fields a pose row carries, combining several Daz morphs into one output, bone-scale reference frames, the section and group tools, and how to find a morph's internal Daz name:
Save = generate#
Press Save. Every save regenerates the character's files in one go:
ROM_<Name>_G9.dsa— the Daz apply-script, installed straight into your Daz library underScripts/DTH-Character-Studio/<Project>/<Character>/<Name>_pose_asset.csv— the Houdini PoseAsset import CSV. It's kept in the project's hidden.dcsmeta/characters/<Character>/folder, together with the studio's other bookkeeping for that character, so your character folder holds only your own files. The export script copies it into the export folder when it runs; see Into Houdini for grabbing it by hand.
Two more scripts appear alongside the ROM one only when their feature is on:
Export_<Name>_G9.dsa— split out only when an Export directory is set and Run the export with the ROM script is turned off; otherwise the export runs inline at the tail of the ROM script (no separate file).Export_Hair_<Name>_G9.dsa— generated when the character lists hair items: it exports one<Name>_Hair_<item>_grooms.abcper listed hair item for Houdini's DazToHueGroom Import node — each item worn, every other wearable hidden.
Each of them gets its own Content Library icon, so you can tell them apart at a glance in Daz — the ROM script's icon even says whether the export runs with it or not. They appear on the next Save (or Tools → Refresh assets for characters you haven't touched since updating).
A character with per-scene ROM overrides additionally gets per-scene PoseAsset CSVs — see Advanced: What Save generates.
Tip
Change anything later and simply Save again — both sides stay in sync.
The rest of the character page#
Everything above covered the ROM. The page around it, box by box:
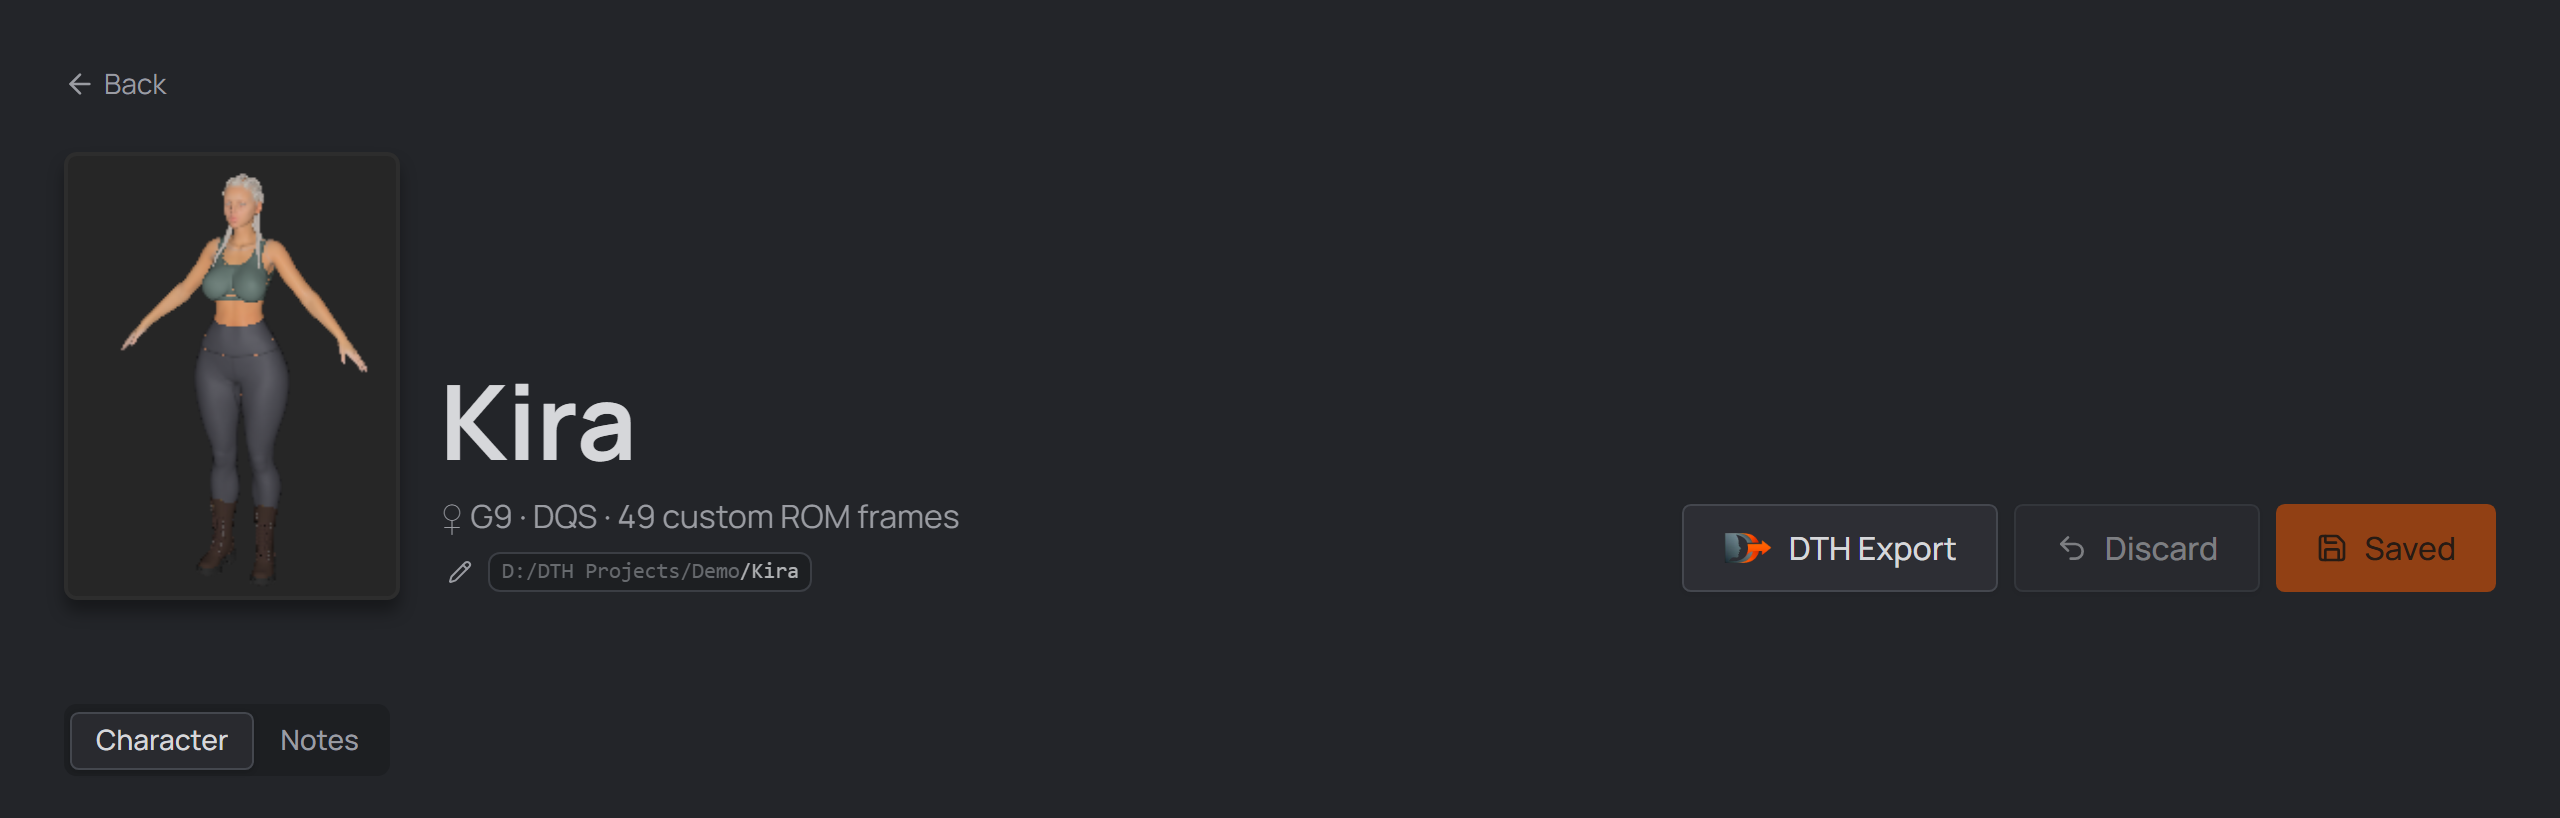
The header — avatar, rename, path chip, Save/Discard#
|
Notes — and the Products tab#
The Notes tab holds freeform markdown notes for this character:
background, art direction, references. Hover, hit the pencil to edit, drop
images or files straight into the editor — it autosaves. Stored as
A Products tab appears when the project switches it on — the scanning itself runs regardless. See Daz product scanning. |
The run report#
After a ROM run in Daz had problems (a missing morph, a failed preset), a report banner appears the moment you switch back to the studio: every failed frame with its reason, grouped under the scene it came from (a batch keeps all scenes' problems). Clicking an entry switches to that scene and jumps to the pose row; the selected scene's failed rows are also tinted red in the tables. Dismiss clears it; a clean run clears it automatically. |
Filling the ROM from another character#
Operations → Fill from character opens the same two-step wizard as at creation: pick a source character (same generation and gender) from any of your projects, then check which of its filled ROM sections to copy (Retargeting always rides with JCM; the Modify JCM frames rules and preserve lists are optional extras). The checked sections replace this character's current config in the editor draft; nothing lands on disk until you save. GEN keeps this character's own scene-derived Golden Palace / Dicktator setup. |
Export & import — the whole character as one zip#
Operations → Export packs the character into a single, self-contained
The zip restores in two ways:
Import fixes every stored path for the new location: the definition's scene /
Houdini / avatar references, the studio's metadata records, and the Houdini
projects themselves — their |
Deleting a character#
Operations → Delete removes the character's folder and generated files,
with a confirmation that lets you keep the Daz files folder (your scenes)
and keep the Houdini files folder (your |